Monday, April 4, 2016

MCG to distribute objects along a path

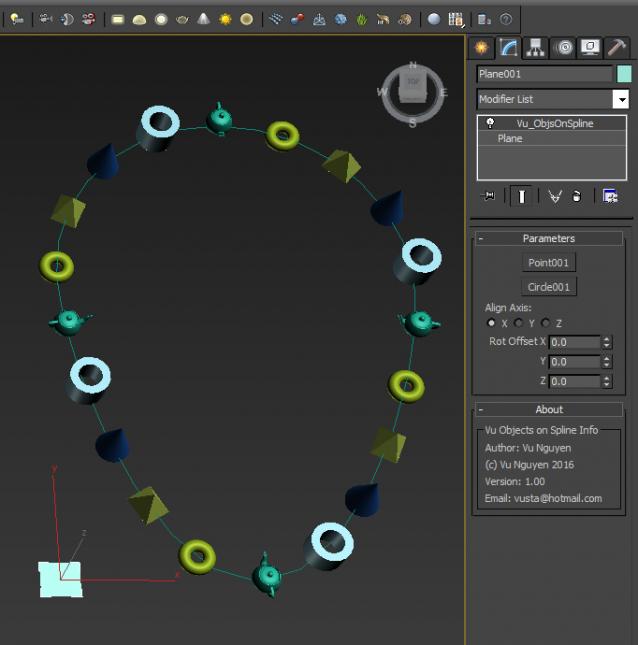
The Objects On Spline is a new free MCG for 3ds max created by Vu Nguyen that can help in the distribution of objects in scenes such as poles, trees and fences, it allows randomize the rotation and accepts change the line after the distribution.

See below the video demonstration of the MCG Objects On Splines for 3ds max, which can help in the distribution of objects in model as poles, trees and fences.
It allows make random rotation of objects and accepts change the line after the distribution, making adjustments.
 

Video Tutorial 


Download the MCG Objects On Splines
http://www.scriptspot.com/files/vu_objsonspline_1.00.zip

Courtesy : http://www.scriptspot.com/3ds-max/mcg/mcg-objects-on-spline

Tuesday, March 24, 2015

Most Wanted Plugins - 3ds Max

Multiscatter

Multiscatter

It’s a fabulous scattering tool that works with V-Ray and Mental Ray both. We know that even with identical objects, the file size grows and grows, especially in a heavy scene. Not to worry using Multiscatter. It handles the file size smartly and effectively. It can also upload and download from VRayProxy memory when needed. So, go create your city scene with lots of buildings, trees, or even furry carpets and rugs without having to worry much about the file size.

Click here to go to the official site.

Forest Pack

Forest Pack

This plugin is designed to create vast surfaces of trees and plants. It has a support for Mental Ray, VRay, VRayRT, Maxwell Render, Octane, Arion, Thea Render and Corona Renderer..huff. It also includes a plant library with more than 100 models. If you want to give it a try, you can also download Forest Pack lite which is a free version of the plugin.

Click here to go to the official site.

RailClone

RailClone

It’s a must have tool for architects and interior designers. It’s a plugin for modelling with parametric support based on custom geometry parts. You can create fences, railings, walls bridges, stairs, to name a few. Also you get a predefined style library. The whole plugin is defined by some construction rules.

Click here to go to the official site.

Rayfire

RayFire

Want to create destruction, shattering, fragmentation, wrecking, bursting or things of these kind? Rayfire plugin may come  in handy. It has an Interactive Demolition system which creates dynamic simulation and demolishes objects depending upon their material and collision strength. Check it out and discover the great deal of features.

Click here to go to the official site.

Realflow

RealFlow

It’s an industry standard award winning plugin basically used for simulating fluids. It is compatible with almost all major 3D platforms like 3ds Max, Maya, Cinema 4D, Lightwave, etc. With this plugin it is possible to mimic the behavior of objects under certain natural forces like gravity, wind, etc.

Click here to go to the official site.

Krakatoa

Krakatoa

This plugin is a volumetric particle rendering, manipulation and management toolkit. It provides a pipeline for acquiring, caching, transforming, modifying, shading and rendering vast quantities of particles at unprecedented speed to represent natural phenomena like dust, smoke, silt, ocean surface foam, plasma and even solid objects. Krakatoa is available for 3ds Max, Maya, Cinema 4D and as a stand-alone renderer. It has been used in many popular movies like Harry Potter, Avatar, GI Joe, The Avengers, Superman Returns…to name a few.

G.I.Joe - The Rise Of Cobra
G.I.Joe – The Rise Of Cobra : Krakatoa was used to render the Nanomites in the tank destruction sequence in the beginning and the Night Raven jet over the White House in the second half of the movie.

Avatar
Avatar : Krakatoa was used for the rendering of the holotable projections

Harry Potter and the Deathly Hallows Part 2

Click here to go the official site.

Ivy Generator

Ivy Generator

It lets you grow ivy on 3d objects. All you have to do is to place the seed the next to your desired model and click “Grow Ivy”.

Click here to go to the official site.

MadCar

MadCar

This plugin is for quick rigging of wheeled vehicles and animating them. With the newer version you can rig vehicles with any number of wheels that includes cars, bikes, trucks, etc.

Click here to go to the official site.

Thinking Particles

Thinking Particles


It’s a particle simulator but not like the native 3ds Max particle flow. It is a non-linear and procedural animation technology. It is controlled by rules and conditions, not by events or timers. It’s an ultimate pack for creating rigid-soft bodies, vehicle simulations, vertex particles, fragments and many more. It’s used in movies like The Avengers, Battleship, Snow White and the Huntsman, Captain America 2, Thor 2, etc.

Click here to go to the official site.

Mighty Tiles Pro

Mighty Tiles

It lets you ease the work of creation of procedural floor and wall textures. It generates high quality textures of brick walls, tiles, parquet, laminate, cobble stones and much more. It comes with an organisation tool called Mighty Library. It is a time saver with great flexibility with high quality rendering being independent from camera settings. You can choose from multiple predefined patterns including complex shapes and yes, repetition of block structures is a thing of the past if you are using Mighty Tiles Pro. It can put variation in arrangement, transformation and color. Doing so many things and yet it saves much memory.

Click here to go to the official site.

GrowFX

GrowFX

Want to create a tree on your own? Here is GrowFX which lets you create plants, trees, flowers and other nature models in a parametric form with multiple parameters for spice, age, grow direction, wind and animation.

Click here to go to the official site.

BonesPro

BonesPro

It lets you do fast, efficient and better organic skinning of characters and objects. This awesome tool allows you to create high quality skin meshes rapidly with easy-to-understand bone influences and vertex assignments, impressive real-time skin-deformations and special-effects. Now no more intersections, jiggling muscles, muscle/object collisions in areas like elbows and knees.

Click here to go to the official site.

Courtesy : http://tutons.com/3ds-max-wanted-plugins/
Tuesday, August 12, 2014

DebrisMaker2 - Procedural geometry creation tool for 3dsMax FREE !!

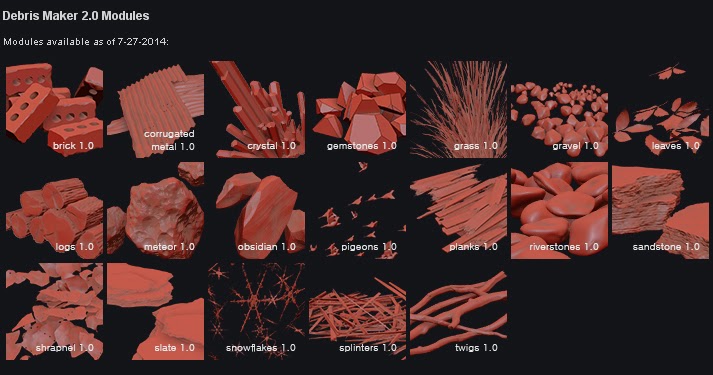
The DebrisMaker2 is the completely free procedural geometry creation tool for 3ds Max, that lets you quickly create objects for your 3D scenes.


With the DebrisMaker2 you can create brick, corrugated metal, crystals, gemstones, snowflakes, grass, gravel, leaves, logs, splinters, meteors, obsidian, pigeons, planks, twigs, river stones, sandstone, shrapnel and slate! You can input parameters to customize the style of your debris, to match your desires.

The Debris Maker is a collection of scripts for 3dsMax that procedurally generate and sometimes animate geometry. Intended to help streamline adding detail to a scene, by creating lots of versions of something quickly, that you can edit, or choose from. The Debris Maker has only been tested in 3dsMax 2013 and 2014, and on windows 7, 8 and 8.1 platforms, however it should work as back 3dsMax 2009, up to current versions.

Wednesday, July 9, 2014

Vray renderer settings - Explanation

Here we have in depth explanation about what each render setting does within Vray.

Here is what we found works for rendering settings using vray. There are many stories on various forums on what makes a difference, but I hope these settings will get people started and able to use vray for production output; which are primarily what these settings are for. However if you need more information as always visit the chaos forums. (www.chaosgroup.com/forums/vbulletin/).

There are 2 other key methods, adaptive and using pure brute force for animation passes which I’m hoping to put in another post… watch this space and I’ll put a link to it when I get 5mins off the work computer!

So the following goes through the 2 all important tabs within the vray renderer, “vray” and “indirect illumination” tabs. The common tab you should know from a basic knowledge of max, of which I will not go into here.

Sunday, June 29, 2014

How to use Render Mask script in 3Ds Max ??

This tutorial will show you how to install and work with the RenderMask script for 3ds Max by Ivan Tepavicharov.

RenderMask helps you render luminance, RGB mask from selected objects. The script don’t affect the scene materials, lights and render settings.


Download RenderMask: tepavicharov.com/scripts.html

Saturday, June 7, 2014

Tips : How to Optimize Your Hardware for Autodesk 3ds Max and faster rendering ??

Autodesk 3ds Max and Autodesk 3ds Max Design software are applications for the creations of special effects for TV and movies, video games and design visualization assets. With such broad capabilities, the software’s systems requirements reflect the diverse aspects of this powerful tool.
Often I see 3ds Max used to review hardware speeds and capabilities because it will draw on every morsel the hardware can give. So, while the development team here at Autodesk works hard on giving you a good list in their system requirements documents, here are some hints to help you get the most out of your 3ds Max experience.
 

Processor

3ds Max relies on your systems processors for a number functions, and as 3ds Max develops, more and more of these functions should become multithreaded.
The most dramatic use of processor is during rendering. Taping into every processor available on the machine, some rendering technologies like mental ray can actually draw on processors from other PCs through its distributed bucket rendering settings.  So when it comes to rendering there’s no doubt that faster and more processors help.

Monday, June 2, 2014

Modeling, Lighting and post production tutorial for interior Visualizations (3ds Max, V-Ray, Photoshop).

Modeling and post production tutorial by ADC Visualizations (3ds Max, V-Ray, Photoshop).

Hi, folks!

My name is Andrea, I am the owner of ADC Visualizations, and i'm gonna share with you the making of "Villa Bonafe - Living room" interior design concept. So let's start!

CONCEPT

This living room is a part of an interior design concept for a house located in Cortina D'Ampezzo (well known in Italy as nice location for winter holidays). The location has a nice mountain view outside so the main goal of the living room was to make this panorama the star of the house: cold outside but very warm and comfortable when you are inside the house.
So that was the main idea: a large open space for living/dining room, with a big window in the front to enjoy the wide terrace and nice panorama. So i decided for a double height room, wooden ceiling and floor. I put a modern fireplace in the center of the room. I'm not gonna go further on design choices because it's not the goal of this tutorial.

BONAFE_makingof_01ref.jpg

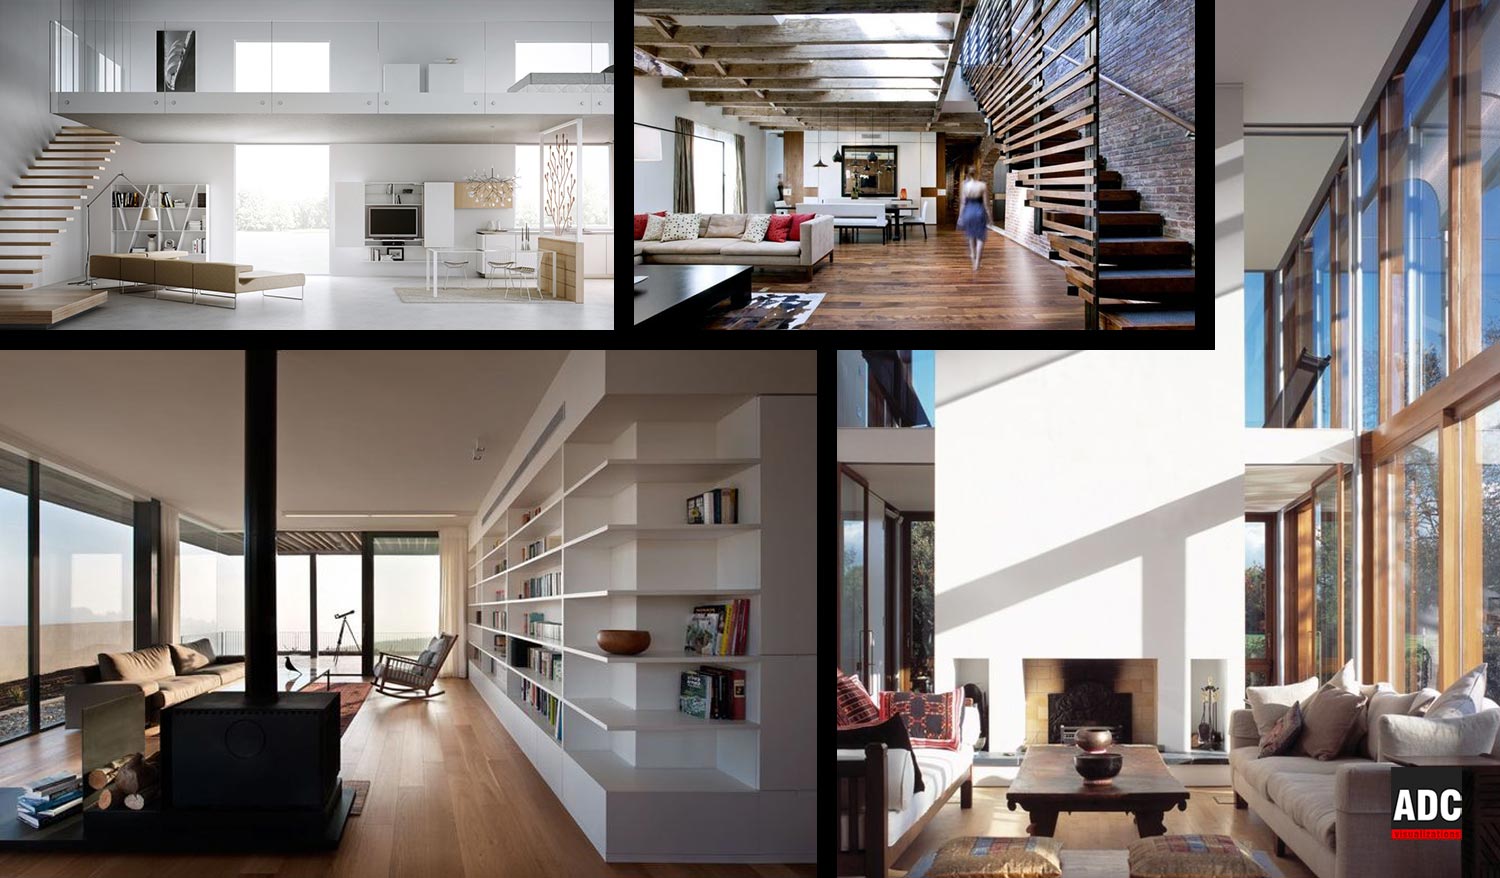
So, the first thing I did was looking for good references for inspirations. That's what I found